Builder
Use the Builder application to generate new simulation scenarios. A scenario is composed of a road network and traffic demand for a rectangular area on the map.

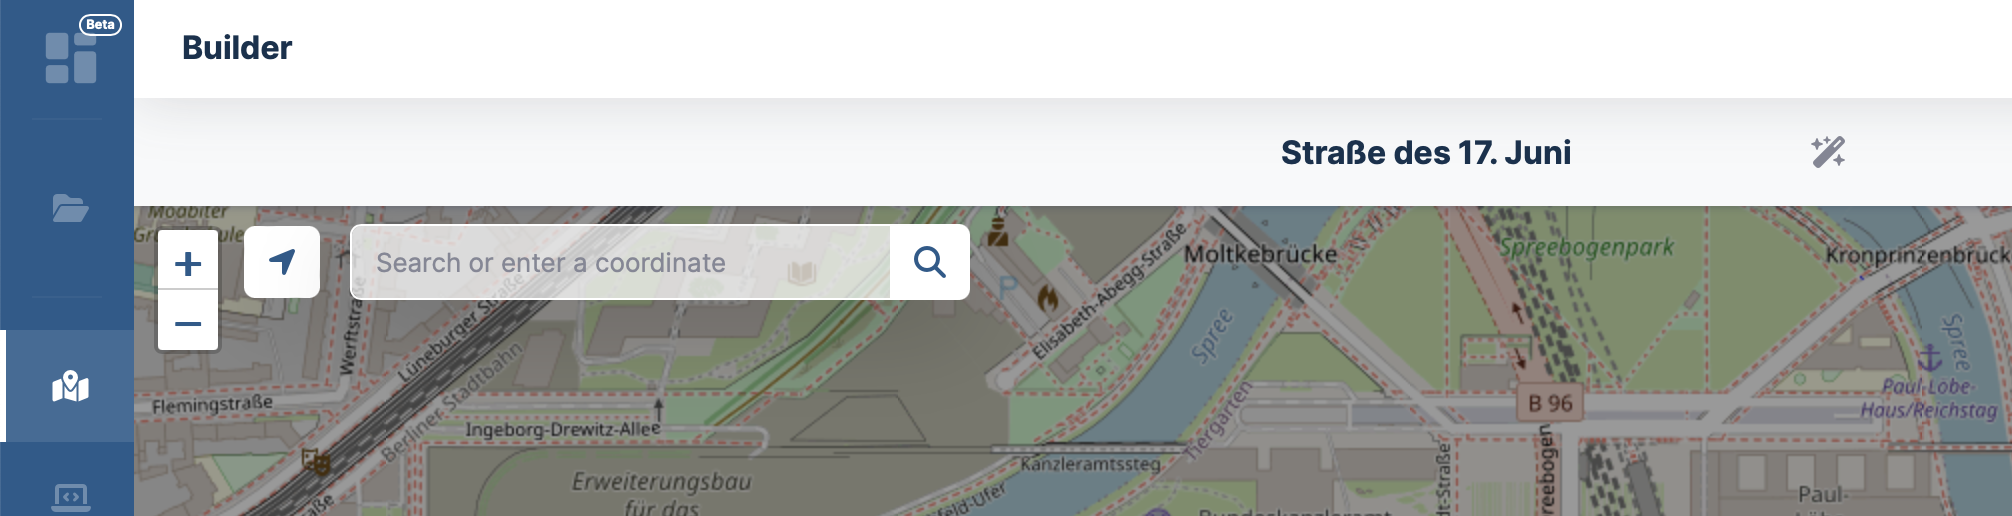
The builder is organized into a full-screen map with a side panel for scenario options and a toolbar at the top with the scenario name and the Build button.
Map
Navigate to the area of interest by dragging the map, using the zoom controls, jumping to your current location, or by searching. The current cursor coordinates are shown at the bottom left, above the map scale.
Searching
Click the search button in the top-left corner of the map to open the search dialog.
You can enter a place name (resolved via OpenStreetMap) or a coordinate pair such as 52.517, 13.38.
A list of matching results is shown; selecting an entry centers the map on that location.
Using your current location
The geolocate control on the top right of the map asks the browser for your current location and, if granted, recenters the map and marks your approximate position with a blue dot.
Scenario name
Enter the scenario name in the input field at the top of the page.
As soon as an area is selected, a magic wand button appears next to the name field. Hovering it shows a name suggestion based on the road network around the center of the selected area; clicking it applies the suggestion.
Area selection
An area selection is required to build a scenario. Click Start rectangle selection in the Area selection panel and then click and drag on the map to draw a rectangle.
Once a rectangle exists:
- It can be resized by dragging any of the four corner handles.
- It can be moved by clicking and dragging the marker inside the rectangle.
- The current width and height of the selection are displayed directly on the rectangle as a live readout.
- The bounding coordinates (north, south, east, west) are listed in the Area selection panel.
- The selection can be cleared with Remove selection or by pressing Esc.
The maximum allowed side length depends on your plan. If the rectangle would exceed that limit, an info alert appears in the panel with the current maximum and a hint to upgrade the plan.
Random traffic
The Random traffic panel controls background traffic that is generated automatically to populate the network. Each category supports the presets Off, Low, Normal, High, or Custom. Selecting Custom reveals two input fields:
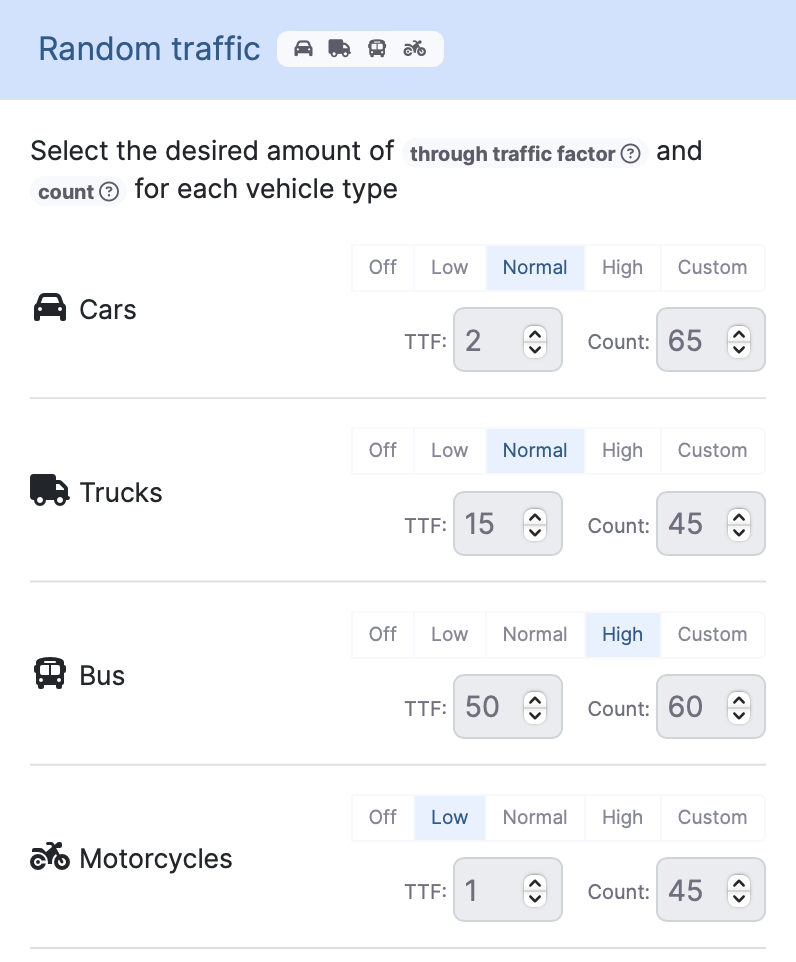
A small badge on the Random traffic header shows icons of the categories that currently contribute traffic, so you can see at a glance which kinds of vehicles will be present.
If Car-only network is enabled in Other settings (see below), non-car categories are marked as unavailable because the imported network does not contain the corresponding infrastructure.
Traffic flows
Beyond background traffic you can define explicit traffic flows between two locations. Use the + Add flow card in the Traffic flows panel to create a flow. You can define up to seven flows per scenario; once that limit is reached a notice is shown instead of the add card.
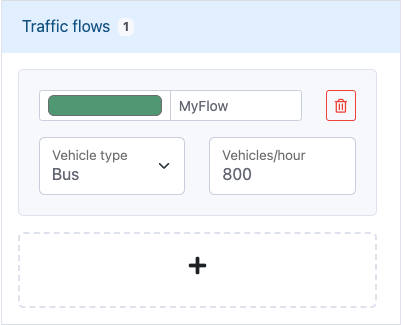
Each flow card lets you configure:
- A flow name (defaults to
Flow 1,Flow 2, ...). - A color used both as the row accent color and as the line color on the map.
- A vehicle type, currently one of: Car (passenger), Taxi, Delivery, Electric vehicle, Bicycle, Motorcycle, Bus, Truck.
- Vehicles per hour as the flow rate. The width of the flow line on the map scales with this value.
- A delete button to remove the flow.
Each flow has a begin marker (green) and an end marker (red) on the map that can be dragged independently. Dragging the line itself moves both markers together while keeping the flow's geometry. Hovering a flow line shows the flow name as a tooltip.
The flow will start on the edge closest to the green marker and end on the edge closest to the red marker.
Warning
Flows must lie inside the selected area. Markers outside the selection are highlighted with a warning indicator, and at build time such flows are cropped to the selected area if possible, or otherwise discarded.
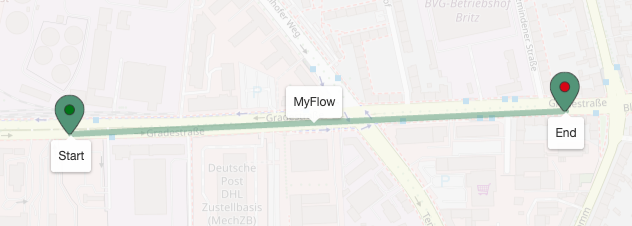
The straight line between begin and end markers is only a visualization aid for selection and dragging. The actual route is computed during the scenario build.
Other settings
The Other settings panel covers everything that is not directly tied to the area or to traffic generation.

- Save in: If your plan supports projects, you can choose the workspace or one of your projects as the destination for the new scenario.
- Duration: Simulated time as hours and minutes. The maximum allowed duration depends on your plan; a warning is shown if the value exceeds the limit.
- Add polygons and POIs: Imports building shapes and points of interest from OpenStreetMap into the scenario.
- Import public transport: Imports public transport routes and stops from OpenStreetMap.
- Car-only network: Imports only roads usable by passenger vehicles. This significantly reduces complexity and speeds up the simulation. When enabling this option, a confirmation dialog lists the vehicle categories (bikes, pedestrians, trams, urban trains, trains, ships) that will be disabled in Random traffic and Traffic flows.
- Handedness: Selects right-hand or left-hand traffic for the scenario.
- Comment: A free-text field for notes about the scenario.
Starting the build
The Build button at the top right is enabled as soon as:
- an area is selected,
- a scenario name is provided, and
- the duration is within the limits of the current plan.
Background traffic and traffic flows are optional; it is possible to build a scenario with no traffic at all.
When you click Build, the builder switches to a results page that shows the live build status.
- A spinner with the current state (Processing) is shown while the scenario is being created. The log section updates as the backend reports progress.
- On success, the spinner turns into a green check mark and quick action buttons are offered to Open the scenario in the workspace, Edit it in the editor, Download the result as a ZIP archive, or directly Run simulation in the simulator.
- On failure, the spinner turns into a red error icon, the log section opens automatically and shows the error message produced by the build.
If your plan limits the number of scenario builds per 24 hours and the limit is reached, the builder shows an upgrade prompt instead of the build button.
If the form contains validation errors when Build is clicked, a Builder Errors dialog lists the problematic fields so they can be corrected and the build can be retried.
Once the build succeeds, the new scenario is available in the Workspace.
-
The Through Traffic Factor (TTF) defines how much more likely it is for an edge on the boundary of the scenario to be chosen as the depart or arrival edge for a random trip compared to an edge located entirely inside the simulation area. ↩
-
The Vehicle Count parameter defines how many trips are generated per hour and per lane-kilometer for the corresponding category. ↩